© by Christa 28.08.2011
English 
This tutorial was written and designed by me © Christa
The © copyright for this tutorial belongs to me alone
The © for the translation belongs to me and Petra

This tutorial may neither be copied, nor offered for download at any other site
The © copyright for the material belongs to each individual artists.
Each of the tutorial, my tinkering has even pay attention to copyright.
My tutorials are intended as a suggestion.
Should I have, unknowingly, violated any copyright, I ask that you notify me via Email
My thanks for the lovely material, for without it these pictures would not be possible
thank you Devilsinside and Corinne.Vicaire  for the Tubes
Tube © Lea
© All copyrights belongs to the original artists
I'm just the designer
This tutorial was written with PSP 9
Print Icon - Print Page


thank you all my tester from my Tutorials
************************************************************
My Material 
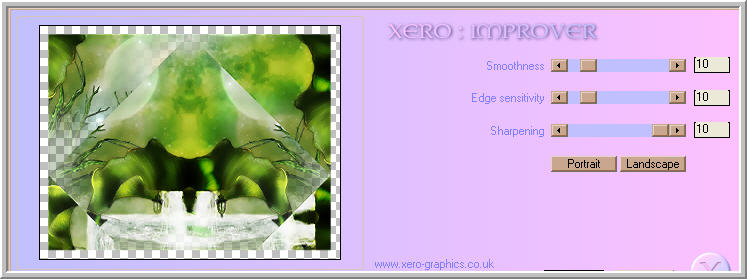
Xero Improver
Simple - Blintz
Graphics Plus Cross Shadow
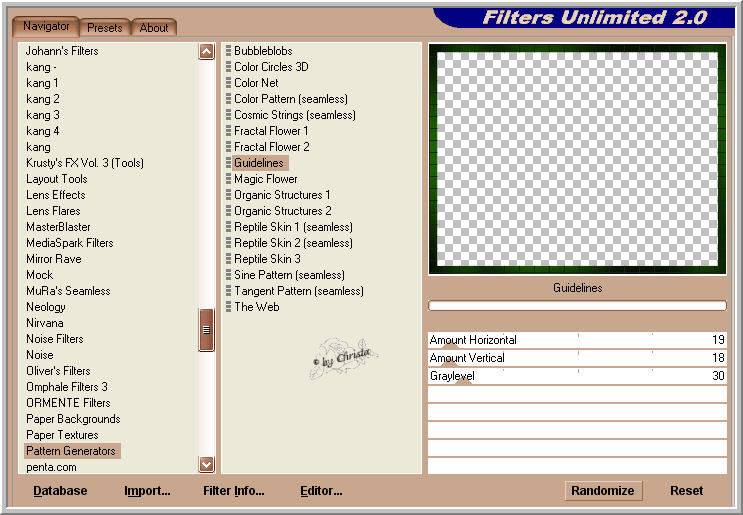
Unlimited 2.0 – Pattern Generators - Guidelines : Here
**********************************************************
|
You may take this little figure
along for your orientation |
|
**********************************************************
A word to all of you
All the discription for my Tutorials are "How I create my Image"
For your Tubes and Colors you maybe change the settings -
If you use my Elements - you have to colorize
I do not write this anymore at the Tutorial
Lets start
******************************
Step: 1
New Canvas 900 x 700 px transparent
light FG Color #85bd52
dark BG Color #113f00
fill Canvas with BG Color
Selection All - Selection - Contract 25 px
Edit - Copy - paste as new Layer
Selection stays
******************************
Step: 2
Copy the Tube Mist corinne.vivaire-p_.psd
paste as new Layer - arrange to the left into the Selection
Selection - Invert - Delete - Selection - None
Layer duplicate - Image - Mirror - Arrange - Send Layer down
Both Layer - Blend Mode - Hard Light
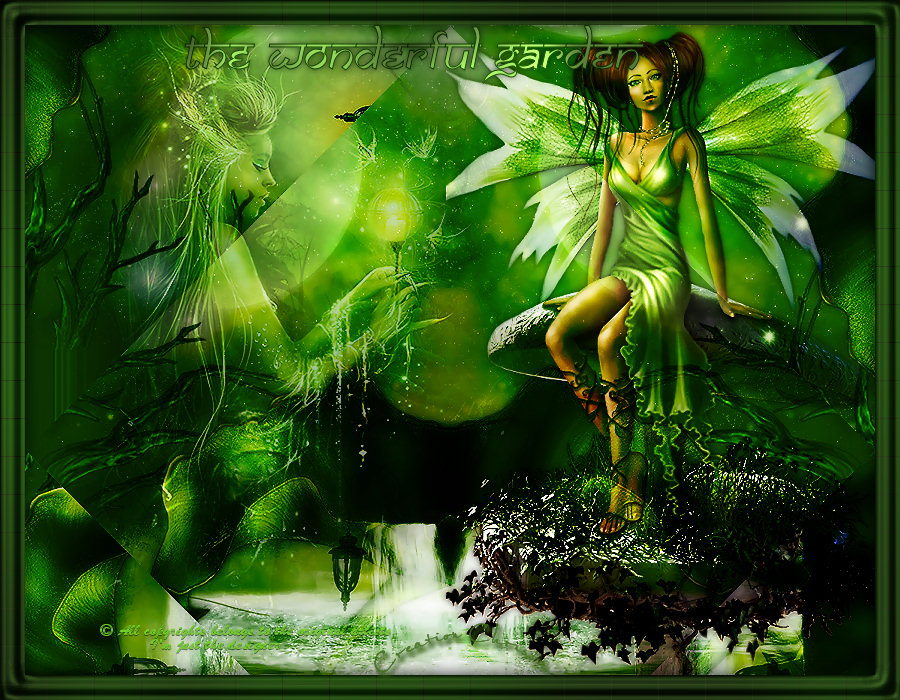
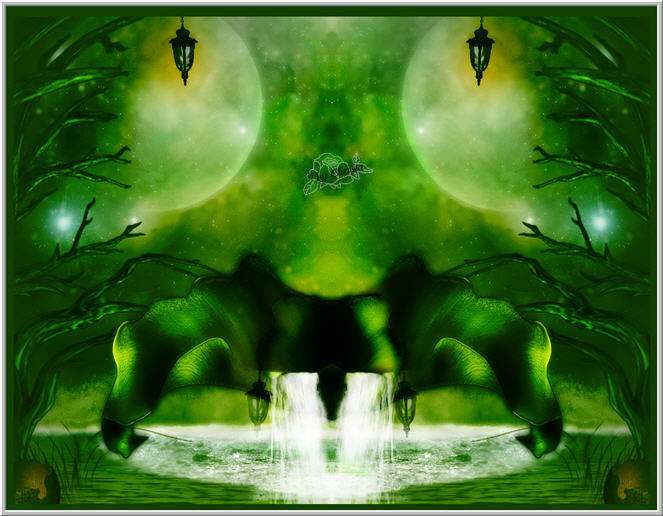
Your Image has to look like this
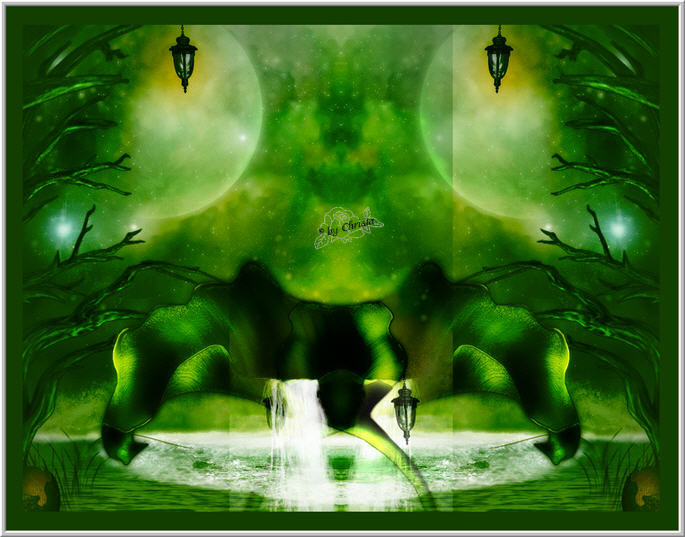
Look to my Arrows at the Screen
Activate the Erasertool with this Values

Erase this part
Your Image has to look like this
If you like your Image - merge down the top Layer
Selection - All - Contract 25 px
Plugin Simple Blintz
Plugin Xero Improver
******************************
Step: 3
Selection - Invert - Layer 1 is activ
Plugin Graphics Plus - Cross Shadow ( Default 128/128)
Edit - Copy - paste as new Layer -
Edit - Paste into a Selection -
Plugin Unlimited 2.0 - Pattern Generators - Guidelines
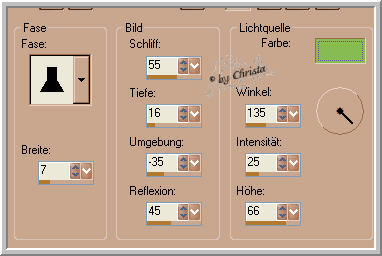
Effects - 3 D Effects - Inner Bevel FG Color
Selection - Invert - New Layer - Arrange - Send Layer down
Effects - 3 D Effects - Cutout
Selection - None
******************************
Step: 4
Copy your Tubes and paste as new Layer
My right Tube f0145CLea.psd - Blend Mode - Hard Light
Adjust this Drop Shadow 0/0/35/10,00 Black
Left Tube - Devilsinside_Exclusiv_102_2009.psd
Blend Mode - Hard Light - Opacity - 62 %
Adjust to both Tubes Xero Improver
******************************
Step: 5
Paste your Text as new Layer
My Font

Paste your Watermark as new Layer
Merge all and save as JPG
I hope you enjoyed the tutorial
Sincerely Christa